Contents
Every so often my creativity grinds to a halt. I'm told this is normal, which may be so, but its frustrating nonetheless.
Over the summer I flirted with some lovely vintage Canon FD glass, which gave a spike of creativity, particularly as they were completely manual lenses and commanded more care and attention to composition and depth of field. The results were stunning and I find myself using the FD 50 1.4 all the time on my R5. Rather than my 24-105 walk around lens. It's a lovely compact setup ideal for travel or street photography.
I've come to the conclusion that I need to make things difficult for myself, and hence there is a whimsical truth in "suffering for art".
So what next?
I last shot film in the early nineties with a point and shoot 35mm. I only really got into photography via digital and I've considered it to be a real learning luxury as you can shoot to your hearts content and not burn cash on expensive film and developing costs.
As much as my skills have improved, I've always felt a bit of fraud calling myself a photographer when I've never shot film SLR or medium format, let alone developed or enlarged it myself.
Clearly a couple of my friends have wrestled with this too and ventured into film with equally great results. So why not?, I figured that I'm proficient enough to understand metering and proper manual control with a digital camera, so transferring that skill across should be easy, right?
Camera
I took the plunge and opted for medium format rather than 35mm as I saw 35mm film as a side step rather than a step up. I've also fallen in love with the square format and its refreshing (though sadly over-used on social media) ratio and composition.
My heart immediately suggested Hasselblad, but my wallet quickly disagreed, so we compromised on a lovely Bronica SQ-AI, and following a number of reviews and how-to guides, I was hooked and pounced on eBay, picking up a lovely example from the folks at Classic Camera Company
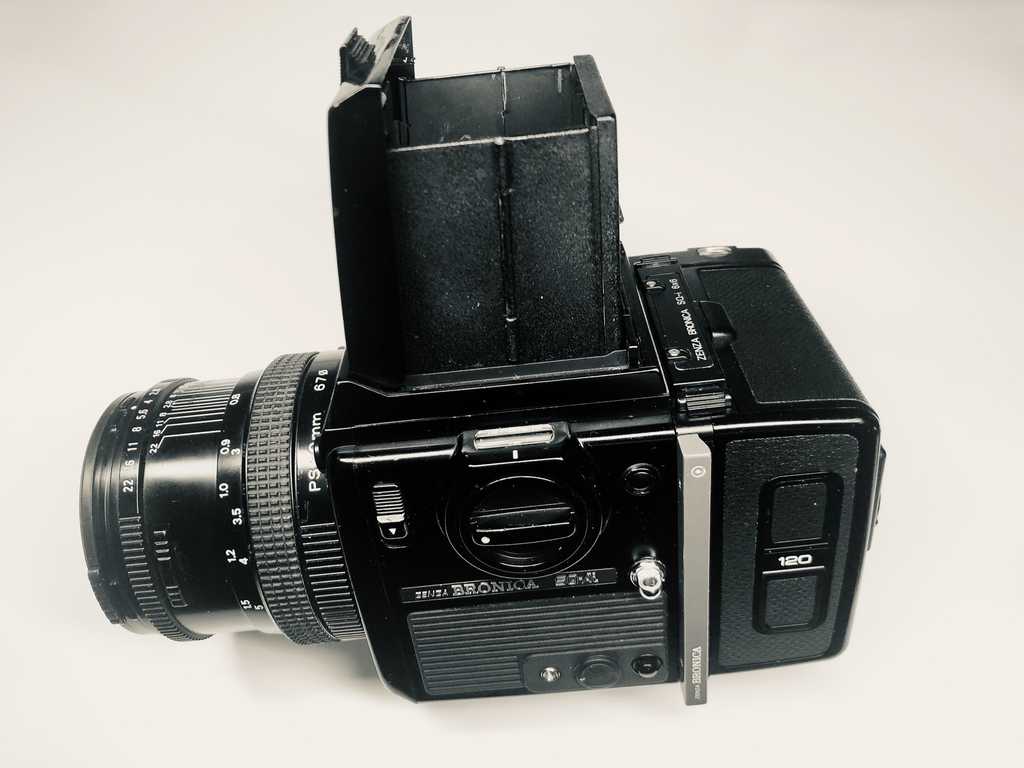
So far, I'm loving it, especially the system approach to the camera, which I've never experienced before. Having interchangeable lenses is one thing, but with the Bronica (same applies to other system cameras like Mamiya, Hasselblad etc) pretty much everything is changeable, which is probably a great thing for a 30+ year old camera!
Film
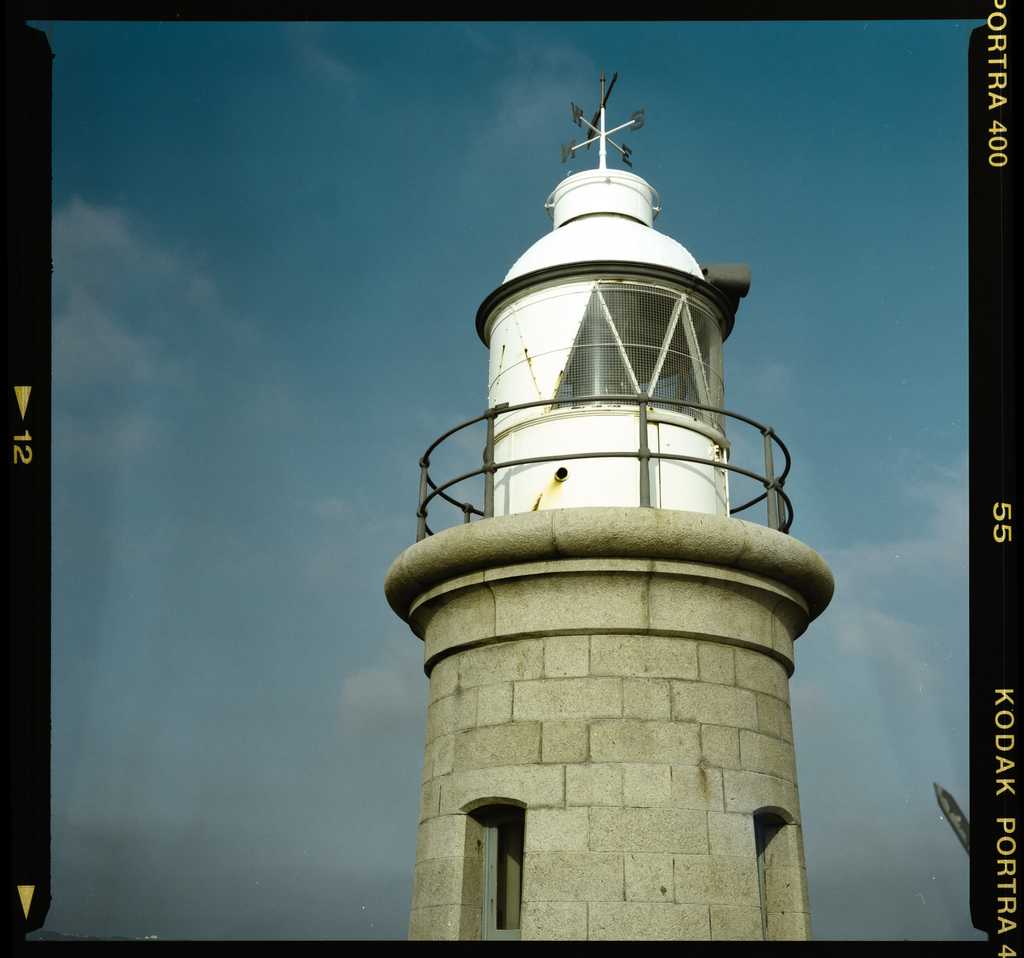
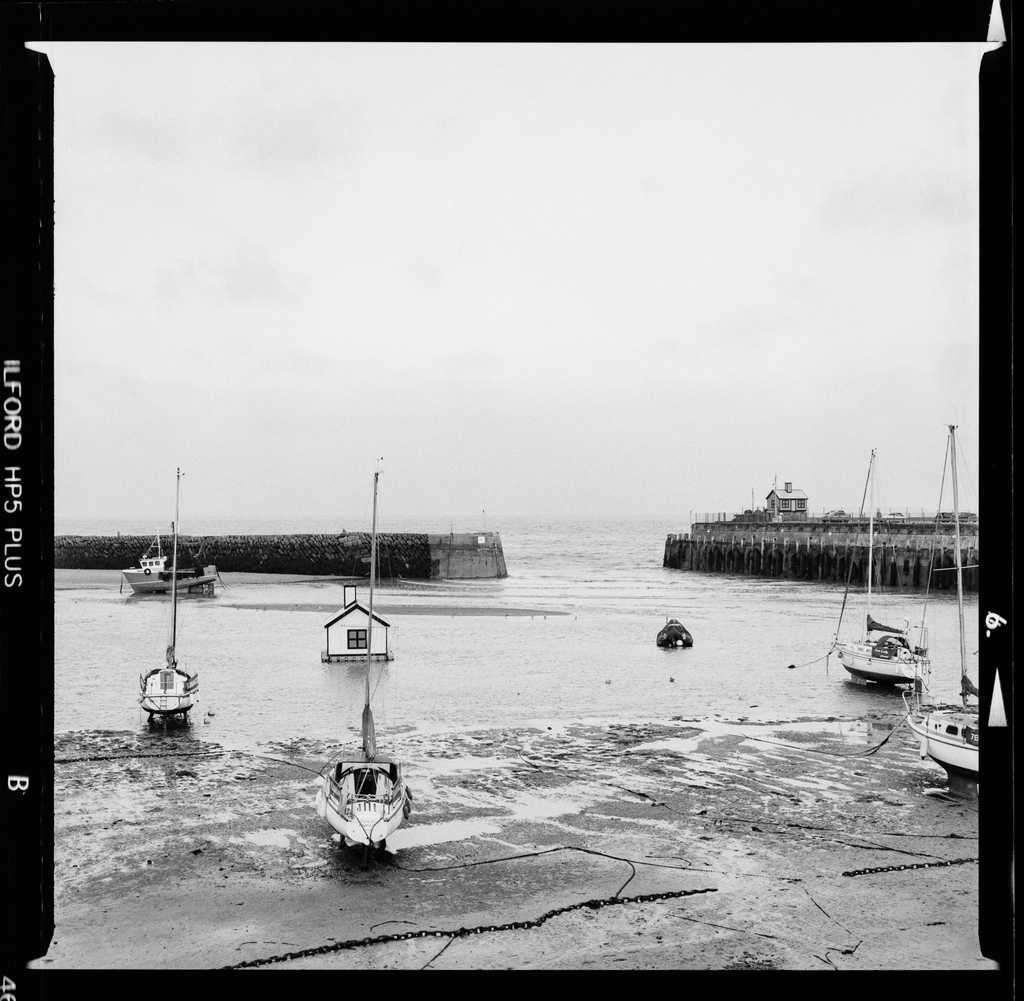
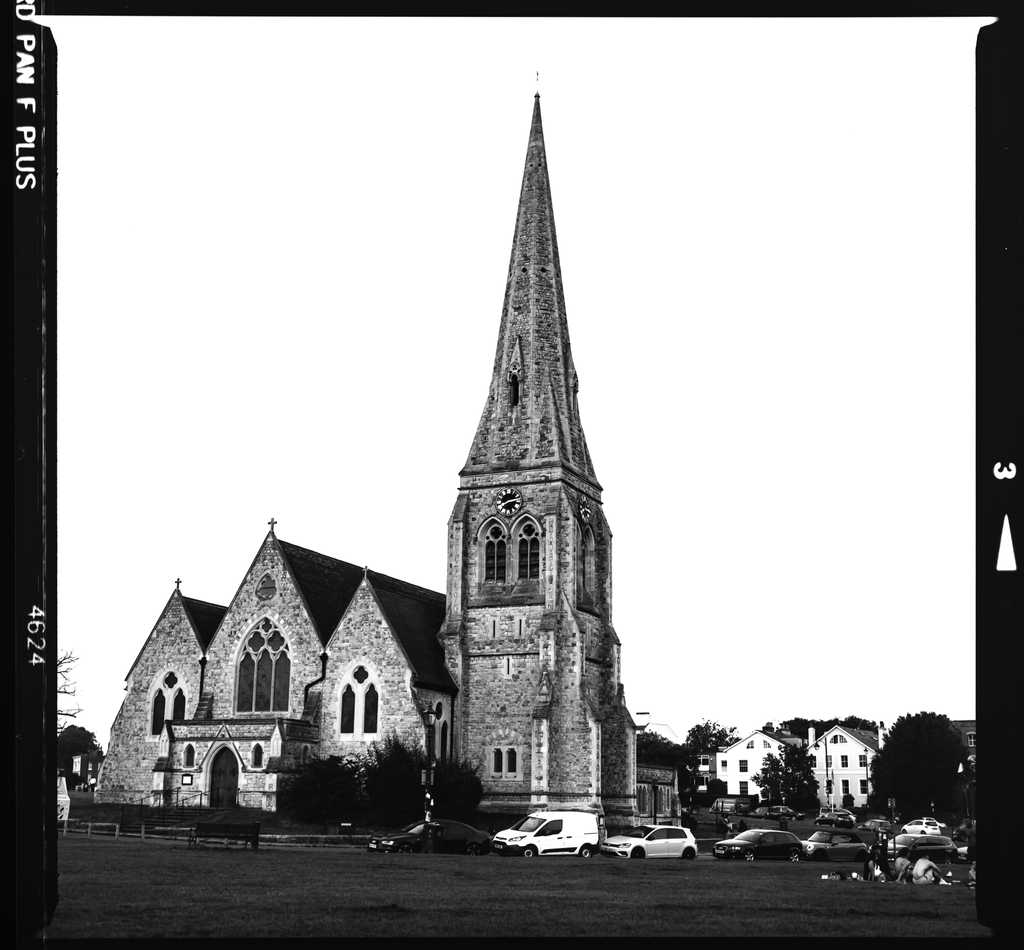
I've shot just over 3x rolls so far, experimenting with colour Kodak Portra 400 and Black & White Ilford HP5 and Ilford Pan F
Developing
In the first instance, I've used Snappy Snaps. Despite mixed online reviews, the local folks in Lewisham seem to have done a good job (hoping that its proximity to Goldsmiths college / art students help with those skills). The developing was quick and from what I can tell, good quality, if a little expensive.
The longer term goal is to develop at home, but I've not got any skill or kit at this stage to do this. Though I'm very tempted by the Lab-Box which seems to simplify the task of rolling the film onto the development spool.
Doing this the traditional way with a Paterson tank and a dark bag fills me full of dread. You can't re-attempt developing!
Digitizing
This was an area I was comfortable to "own" myself having scanned 35mm slide and negatives plenty of times before. It became clear that my old Epson V550 scanner wasn't going to cut it as it could only handle 35mm film, not 120 film. On my research into scanners I saw costs for decent flatbeds, let alone dedicated film scanners creep into several thousands! Fortunately, I then stumbled across a few YouTube videos showing folks use digital cameras to scan; simply with a decent camera, tripod, macro lens and steady light-source. Given that I already have 3 out of the 4 items, I went and bought an LED lightbox
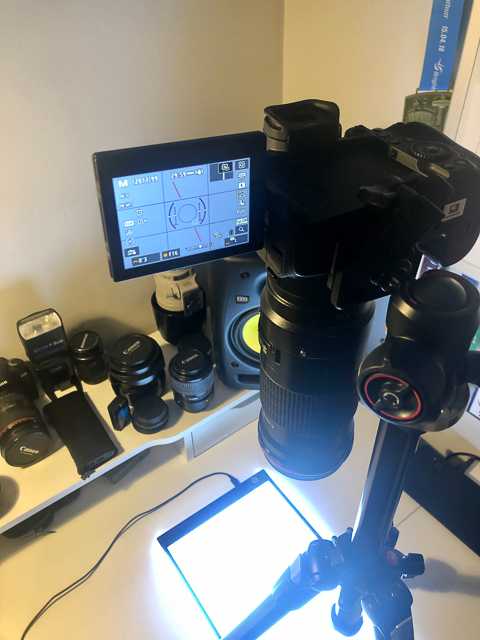
The process is pretty straightforward and quick. The most fiddly part is ensuring the camera angle is correct so that you aren't distorting the scan.
My Canon 180mm 3.5 macro lens works a charm @ F16 and around 1/2 second. Use a timer and manually focus the lens using the live view mode.
Scanning with the emulsion side of the film up (facing the camera) works best since the emulsion is matte, and therefore less opportunity for glare. I'd also recommend reducing the light in the room as much as possible so that the light-box is the only light source, this saves stray light from ceiling lights or windows creeping in.
Once captured, it's simply a case of importing into Lightroom as per normal, then the fun starts!
I've created Lightroom profiles for each film type which helps with 80-90 of the conversion.
The process is quite simple, but always needs a bit of fettling and some subjectivity around contrast and satuation levels.
The first step is to use the S curve to flip the dark and light. 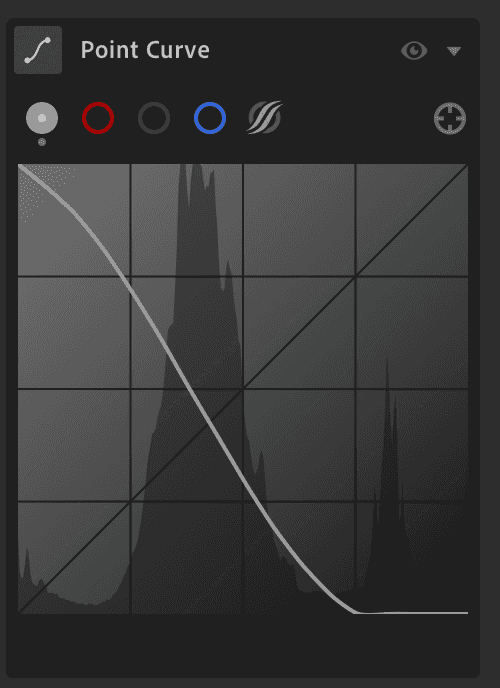
The process now diverges between colour and B&W.
Colour
Colour can bit a bit of pain due to film itself having a natural yellow tint. I've found the following settings a really good "go-to":
- Blacks = -70
- Contrast = 10
- Exposure = 1.5 stops
- Temperature = ~2500 depending on time of day
- Tint = -40
- Vibrance = -40
- Saturation = -15
- Clarity / Noise reduction to taste
B&W
Black and white processing is clearly easier and there are no tints to manage:
- Desaturate completely
- Use exposure, curves and contrast to taste
- Use the noise reduction (partcularly on 400 film) to remove some of the grain/noise
- Sharpen to taste (I tend to use the clarity slider)
From there, moderate the settings to taste (e.g. saturation, high/low key etc), use the healing brush to tackle any dust speckles, and then finally crop.
There are really good plugins/tools like Negative Lab pro etc, but I've found the above is sufficient at this point. The processing is fractionally more than a pure digital shoot, but the scanning is pretty painless. I'd also consider getting a negative carrier or scanner mask (or make one) to hold the negatives flat on the lightbox. I've found I can scan a roll of 120 in about 15 mins, and do post in around 30 mins.
Wrapping Up
Its fun, and I'm really enjoyed the more protracted process. I suppose in some way it makes a photo less of a commodity and more of a crafted effort. With digital photography and especially phone cameras (and their amazing quality) its makes photography sometimes too easy and disposable.
I'll still shoot digital, but I see myself using digital for macro and fast action wildlife, and film more for contemplative landscape and people watching where I can slow things down and take my time.


